Ready to transform your exhibition presence and generate dramatically more leads? This comprehensive 4,000+ word guide reveals exactly how to design professional pull-up banners, pop-up displays, and exhibition graphics that capture attention and convert visitors into customers.
As Singapore's leading exhibition design specialists at PullUpStand.com, we've analyzed data from over 10,000 successful exhibitions. Furthermore, our research shows that professionally designed displays generate 300% more qualified leads than basic designs. Today, we're sharing our complete methodology for creating winning exhibition materials.
This tutorial covers everything from AI-powered design techniques to technical printing specifications. Moreover, you'll learn industry secrets for Singapore's unique exhibition environment, including climate considerations and venue-specific requirements for Marina Bay Sands and Suntec Convention Centre.
Chapter 1: Singapore Exhibition Landscape Analysis - Market Intelligence for 2025
Exhibition Industry Statistics and Opportunities
Singapore's exhibition industry generates over $2.8 billion annually, hosting 120+ major exhibitions with 4.2 million attendees. Additionally, the city ranks #2 globally for international meetings, making it Asia's premier exhibition destination. However, this success creates intense competition requiring strategic design approaches.
Current market analysis reveals key trends driving exhibition success:
- Lead Quality Focus: 78% of exhibitors prioritize qualified leads over visitor quantity
- Digital Integration: 65% of successful booths incorporate interactive elements
- Brand Recognition: Professional displays increase brand recall by 340%
- ROI Measurement: Top performers track cost-per-lead averaging $45-85 SGD
- Climate Adaptation: 89% of repeat exhibitors specify humidity-resistant materials
Venue-Specific Requirements and Considerations
Marina Bay Sands Exhibition Specifications:
- Ceiling Height: 6-12 meters (affects banner visibility angles)
- Lighting: Warm LED systems (enhances reds/oranges, dulls blues)
- Visitor Demographics: 67% C-suite executives, 23% international attendees
- Average Dwell Time: 8.3 minutes per booth (above industry average)
- Setup Window: 4-6 hours maximum for large displays
- Power Supply: 13A single phase standard, 32A available on request
Suntec Singapore Convention Centre Details:
- Ceiling Height: 4.5-8 meters (requires careful vertical design)
- Lighting: Mixed fluorescent/LED (cooler color temperature)
- Noise Levels: Higher ambient sound (requires larger text for readability)
- Visitor Flow: 2,400 visitors per hour peak periods
- Climate Control: 22-24°C, 60-65% humidity maintained
- Loading Access: Direct vehicle access for large displays
Competitive Analysis Framework
Before designing any exhibition material, conduct thorough competitive research:
- Photograph competitor displays from previous events in your industry
- Analyze color schemes - identify overused combinations to avoid
- Document messaging strategies - note effective headlines and value propositions
- Assess technology integration - determine optimal innovation level
- Evaluate booth traffic patterns - understand visitor behavior
- Study material choices - identify quality standards in your sector
Chapter 2: Professional Design Software Mastery - Complete Setup Guide
Adobe Creative Suite - Industry Standard Setup
Adobe Photoshop Configuration for Large Format Printing:
-
Color Settings Setup:
- Edit > Color Settings
- Working Spaces RGB: sRGB IEC61966-2.1
- Working Spaces CMYK: Japan Color 2001 Coated
- Color Management Policies: Convert to Working CMYK
- Profile Mismatches: Ask When Opening, Ask When Pasting
-
Document Creation for 85cm x 200cm Banner:
- File > New > Print
- Width: 21.25cm (25% of final size)
- Height: 50cm (25% of final size)
- Resolution: 300 pixels/inch (scales to 75 DPI at full size)
- Color Mode: CMYK Color, 8 bit
- Background Contents: White
-
Workspace Optimization:
- Window > Workspace > Photography (best for image editing)
- View > Rulers (Ctrl+R) for precise measurements
- View > New Guide Layout for systematic positioning
- Window > Info panel for real-time measurements
Adobe Illustrator Vector Graphics Setup:
-
New Document Configuration:
- File > New > Print
- Width: 21.25cm, Height: 50cm
- Units: Millimeters (more precise for printing)
- Orientation: Portrait
- Artboards: 1 (single banner design)
- Color Mode: CMYK
- Raster Effects: 300 ppi (critical for high quality)
-
Grid and Guide Setup:
- View > Show Grid for alignment assistance
- Preferences > Guides & Grid > Gridline every 1cm
- View > Snap to Grid for precise positioning
- Object > Path > Add Anchor Points for detailed editing
Cost-Effective Professional Alternatives
Affinity Photo Professional Setup (One-time $70 SGD):
-
Document Creation:
- File > New
- Type: Print
- Document Units: Millimeters
- Width: 212.5mm, Height: 500mm
- DPI: 300 (for 25% scaling)
- Color Format: CMYK/8
- Create Document
-
Color Management:
- Edit > Preferences > Color
- RGB Profile: sRGB IEC61966-2.1
- CMYK Profile: ISO Coated v2 (ECI)
- Monitor Profile: Use System Profile
GIMP Professional Configuration (Free):
-
Color Profile Installation:
- Download ICC profiles from Adobe or ECI.org
- Copy profiles to GIMP color profile folder
- Windows: C:\Windows\System32\spool\drivers\color
- Mac: /System/Library/ColorSync/Profiles
-
CMYK Support Setup:
- Install Separate+ plugin for CMYK separation
- Download from registry.gimp.org
- Extract to GIMP plugins directory
- Restart GIMP and access via Colors > Separate
AI-Powered Design Tools Integration
Canva Pro Optimization for Professional Printing:
-
Account Setup:
- Subscribe to Canva Pro ($15 SGD/month) for CMYK export
- Enable Brand Kit for consistent color management
- Upload brand fonts (supports TTF, OTF formats)
- Create brand color palette using hex codes
-
Custom Size Configuration:
- Create Design > Custom Size
- Width: 2125 pixels, Height: 5000 pixels
- Units: Pixels (Canva's native measurement)
- This equals 21.25cm x 50cm at 300 DPI
-
CMYK Color Selection Strategy:
- Use online CMYK color picker (e.g., rapidtables.com)
- Convert your brand colors to CMYK values
- Note hex equivalents for Canva input
- Test colors with small proof prints
Advanced AI Image Generation Workflows:
Midjourney for Exhibition Graphics:
-
Discord Setup:
- Join Midjourney Discord server
- Subscribe to Basic Plan ($10 USD/month)
- Access newbie channels for learning
- Study community prompts for inspiration
-
Professional Prompt Engineering:
- Basic structure: [Subject] + [Style] + [Technical specs] + [Parameters]
- Example: "modern tech conference banner, professional corporate style, clean blue white color scheme, horizontal layout --ar 17:40 --v 6"
- Aspect ratio --ar 17:40 matches 85cm x 200cm banner proportions
- Use --stylize 250 for moderate artistic interpretation
-
Result Optimization:
- Generate initial concepts with broad prompts
- Use U1-U4 buttons to upscale preferred results
- Apply V1-V4 for variations of selected concepts
- Download highest resolution for design reference
Adobe Firefly Professional Integration:
-
Access Methods:
- Direct web access: firefly.adobe.com
- Integrated in Photoshop 2024+ (Generative Fill)
- Available in Adobe Express for quick designs
- Commercial use licensing included with Creative Cloud
-
Text-to-Image Best Practices:
- Detailed prompts yield better results than vague descriptions
- Include lighting preferences: "soft professional lighting"
- Specify style: "corporate photography style" or "modern illustration"
- Add composition details: "centered composition, negative space for text"
Chapter 3: Step-by-Step Banner Design Methodology
Strategic Design Planning Phase
Audience Analysis and Message Development:
-
Primary Audience Identification:
- Job titles: CEO, CTO, Procurement Manager, etc.
- Company size: SME (10-200 employees) or Enterprise (200+)
- Industry sector: Technology, Finance, Healthcare, Manufacturing
- Decision-making authority: Budget holder vs. influencer
- Pain points: Cost reduction, efficiency, compliance, growth
-
Unique Value Proposition (UVP) Development:
- Quantify benefits: "Reduce costs by 40%" vs. "Save money"
- Include timeframes: "Implementation in 30 days" vs. "Quick setup"
- Specify outcomes: "Increase productivity by 2.5x" vs. "Boost efficiency"
- Address objections: "No upfront costs" or "Risk-free trial"
-
Competitive Differentiation:
- Identify gaps in competitor messaging
- Highlight unique features or approaches
- Emphasize superior results or outcomes
- Showcase awards, certifications, or recognitions
Professional Pull-Up Banner Design Process
Layout Architecture for 85cm x 200cm Banners:
-
Header Zone (0-40cm from top):
- Company logo: Maximum 15cm width, positioned left or center
- Primary headline: 72pt minimum font size for 3-meter readability
- Background: Solid color or subtle gradient for text contrast
- Safety margin: 3cm from edges to prevent cutting
-
Hero Section (40-120cm from top):
- Primary visual: Product image, team photo, or graphic illustration
- Image resolution: Minimum 150 DPI at full size
- Composition: Leave 30% white space for text overlay
- Color harmony: Maintain brand consistency with header
-
Benefits Section (120-170cm from top):
- 3-5 key benefits maximum (cognitive load management)
- Bullet point format with icons or graphics
- Font size: 36pt minimum for readability
- Hierarchy: Most important benefit listed first
-
Action Zone (170-200cm from top):
- Contact information: Website, phone, email
- QR code: 3cm x 3cm minimum for smartphone scanning
- Call-to-action: "Visit Booth A42" or "Scan for Demo"
- Social media handles if relevant to B2B audience
For professional hardware solutions, explore our Pull Up Banner Stands collection featuring Budget Series (from $95), Premium Series (from $110), and Deluxe Series (from $180) with different base designs and stability features.
Typography Hierarchy and Readability Standards:
-
Font Selection Criteria:
- Sans-serif fonts mandatory for exhibition graphics
- Recommended: Helvetica, Arial, Montserrat, Open Sans
- Avoid: Script fonts, decorative typefaces, thin weights
- Maximum 2 font families per banner design
-
Size Requirements by Section:
- Main headline: 72pt minimum (equals 2.54cm height)
- Subheadings: 48pt minimum (equals 1.69cm height)
- Body text: 36pt minimum (equals 1.27cm height)
- Contact details: 24pt minimum (equals 0.85cm height)
-
Contrast and Legibility:
- Minimum contrast ratio: 4.5:1 for accessibility compliance
- Preferred contrast: 7:1 for optimal exhibition lighting
- Test readability: View design at 25% size from arm's length
- Color combinations: Dark text on light backgrounds preferred
Pop-Up Display Design Mastery
3x3 Pop-Up Display Panel Layout (9 panels total):
-
Panel Dimensions and Specifications:
- Individual panel size: 60cm x 60cm (2ft x 2ft)
- Design dimensions: 15cm x 15cm at 25% scale
- Resolution: 300 DPI at scale (75 DPI full size)
- File format: High-resolution PDF with embedded fonts
-
Visual Flow Planning:
- Left column: Company introduction, credentials, awards
- Center column: Main product/service showcase, benefits
- Right column: Contact information, testimonials, QR codes
- Top row: Headers and primary messaging
- Middle row: Hero visuals and key features
- Bottom row: Supporting details and calls-to-action
-
Seamless Design Techniques:
- Background elements span multiple panels
- Text and logos contained within single panels
- 5mm overlap compensation for curved displays
- Color gradients aligned across panel boundaries
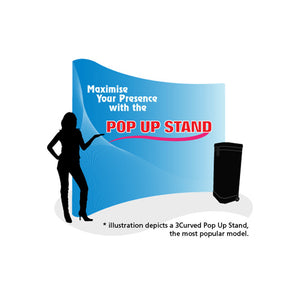
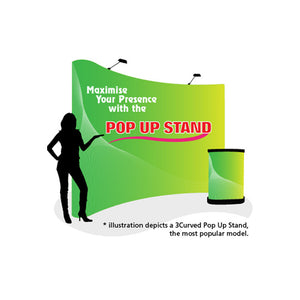
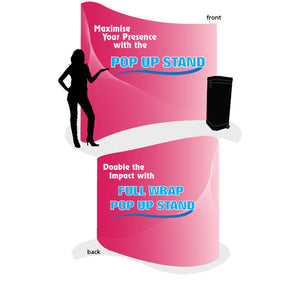
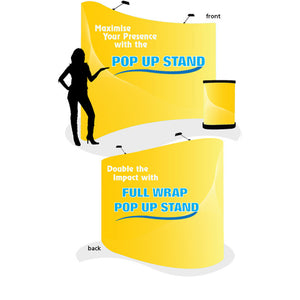
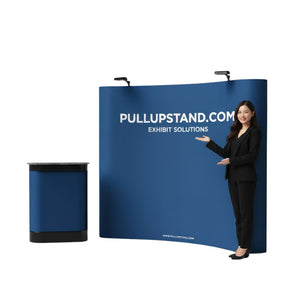
Browse our complete Pop Up Stands collection for professional backdrop display systems that create massive impact at exhibitions and trade shows, including straight and curved configurations.
Advanced Pop-Up Design Strategies:
-
Modular Content System:
- Design flexible panels for different booth sizes
- Create master template with interchangeable elements
- Develop product-specific and event-specific variations
- Maintain brand consistency across all configurations
-
Curved Display Optimization:
- Account for viewing angle distortion
- Adjust text orientation for optimal readability
- Use perspective guides in design software
- Test with physical mockup when possible
Chapter 4: Advanced Color Management and Printing Technology
CMYK Color Science for Exhibition Graphics
Understanding Color Gamut Limitations:
-
RGB vs CMYK Gamut Comparison:
- RGB displays: 16.7 million colors possible
- CMYK printing: 5-10 million colors achievable
- Overlap: Approximately 70% color compatibility
- Problem areas: Bright blues, vibrant greens, neon colors
-
Color Conversion Best Practices:
- Convert to CMYK early in design process
- Use perceptual rendering intent for photos
- Apply relative colorimetric for logos/brand colors
- Manual adjustment often required post-conversion
-
Professional Color Formulas:
- Rich Black: C=30, M=30, Y=30, K=100
- Cool Black: C=60, M=40, Y=40, K=100
- Warm Black: C=30, M=60, Y=60, K=100
- Pure White: C=0, M=0, Y=0, K=0 (no tints)
Advanced Color Workflows by Software:
Photoshop CMYK Conversion Process:
-
Preparation Steps:
- Duplicate RGB working file (preserve original)
- Flatten all adjustment layers
- Check Image > Mode > Assign Profile > Working CMYK
- Preview conversion: View > Proof Setup > Working CMYK
-
Conversion and Adjustment:
- Image > Mode > CMYK Color
- Choose "Adobe (ACE)" for color engine
- Select "Perceptual" intent for photos
- Enable "Use Black Point Compensation"
- Manually adjust problematic colors using Selective Color
Illustrator Vector CMYK Workflow:
-
Document Setup:
- File > Document Color Mode > CMYK Color
- Edit > Color Settings > Working CMYK: Japan Color 2001 Coated
- Window > Color > CMYK sliders
- Window > Swatches > Load color libraries
-
Professional Color Application:
- Use Pantone Solid to Process guides
- Create custom swatches for brand colors
- Apply Overprint Preview for accuracy
- Check separation preview before final export
Resolution and Image Quality Optimization
Scientific Resolution Calculation:
-
Viewing Distance Formula:
- Required DPI = (Viewing Distance in inches × 150) ÷ Banner width in inches
- Example: 3-meter viewing distance for 85cm banner
- Calculation: (118 inches × 150) ÷ 33.5 inches = 528 DPI
- Practical application: 100-150 DPI sufficient for this scenario
-
Size-Specific Resolution Guidelines:
- A4 size (up close viewing): 300 DPI minimum
- Pull-up banners (85cm x 200cm): 125 DPI optimal
- Pop-up displays (3m x 2.3m): 80-100 DPI recommended
- Large backdrops (5m+ width): 50-75 DPI acceptable
- Outdoor billboards (10m+ viewing): 30 DPI sufficient
AI Image Enhancement Workflows:
Let's Enhance Professional Usage:
-
Account Setup and Credits:
- Free tier: 10 credits (use for testing)
- Pro plan: 100 credits monthly ($9 USD)
- Business plan: 300 credits monthly ($19 USD)
- Credit usage: 1 credit per image, regardless of enhancement factor
-
Enhancement Selection Strategy:
- "Photo" mode: Best for product photography and portraits
- "Art & CG" mode: Optimal for graphics and illustrations
- "4x" enlargement: Standard for banner applications
- "16x" enlargement: For severely low-resolution sources
-
Quality Assessment:
- Download enhanced image in highest available resolution
- Compare with original at same viewing size
- Check for artificial sharpening artifacts
- Verify color accuracy hasn't shifted
Vectorizer.AI Logo Optimization:
-
Input Preparation:
- Clean source image: Remove backgrounds and noise
- High contrast: Ensure clear distinction between elements
- PNG format preferred over JPEG for sharp edges
- Maximum upload size: 1MB for optimal processing
-
Vectorization Process:
- Upload image to vectorizer.ai platform
- AI processing typically takes 30-90 seconds
- Review automatic color separation results
- Download SVG file for infinite scalability
-
Post-Processing in Illustrator:
- Import SVG and ungroup all elements
- Clean up unnecessary anchor points
- Simplify complex paths using Object > Path > Simplify
- Apply appropriate CMYK colors to vector shapes
Chapter 5: Specialized Display Design Techniques
Retractable Banner Stand Optimization
Hardware-Specific Design Considerations:
-
Base Mechanism Allowances:
- Standard cartridge base: 15cm height occupied
- Visible banner area: 185cm (200cm minus 15cm base)
- Safety zone at bottom: Additional 5cm margin recommended
- Effective design height: 180cm maximum
-
Tension and Curl Compensation:
- Banner material naturally curves toward cartridge
- Design text to compensate for 2-3 degree curvature
- Avoid detailed graphics near banner edges
- Use anti-curl lamination for premium presentations
-
Transport and Setup Optimization:
- Design for one-person assembly (60-second setup)
- Include setup instructions on banner reverse side
- Consider carrying case dimensions for transport
- Plan for easy graphic replacement and updates
View our complete Premium Pull-Up Banner Stands for professional display solutions starting from $110 SGD, featuring premium matte lamination and enhanced stability.
X-Banner and A-Frame Display Design
X-Banner Structural Considerations:
-
Tension Distribution:
- X-frame creates uneven tension across banner surface
- Higher tension at corners, lower at center
- Design important elements away from high-stress areas
- Use flexible banner materials to prevent tearing
-
Size Variants and Applications:
- Desktop X-Banner: 40cm x 120cm (table displays)
- Standard X-Banner: 60cm x 160cm (floor standing)
- Large X-Banner: 80cm x 180cm (high visibility)
- Jumbo X-Banner: 120cm x 200cm (trade show impact)
-
Wind Resistance for Outdoor Use:
- Avoid large solid color areas that catch wind
- Include strategic perforations or mesh sections
- Design with wind-load considerations
- Use weighted bases for stability
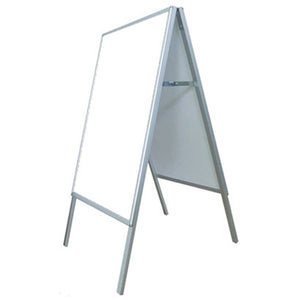
A-Frame Poster Design Strategies:
-
Dual-Sided Design Optimization:
- Approach side: Company branding and headline
- Departure side: Contact information and action
- Consistent design elements across both sides
- Weather protection for outdoor applications
-
Sidewalk and Storefront Integration:
- Comply with local sidewalk usage regulations
- Design for 1-3 second viewing window
- High contrast essential for street lighting
- Include business location and hours
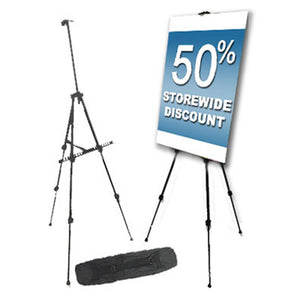
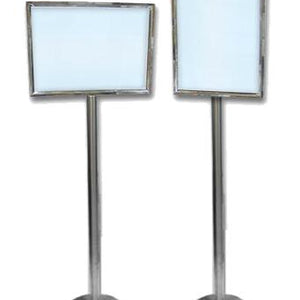
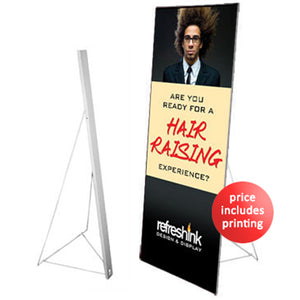
Complete your exhibition setup with our Display Stands and Sign Stands collection, featuring A-Frame poster stands, X-Banner stands, and various sign stands for professional presentations in any environment.
Chapter 6: AI-Powered Design Revolution
Advanced AI Prompt Engineering
Midjourney Master Prompts for Exhibition Design:
-
Technology Conference Banner:
- Prompt: "professional technology conference banner, corporate blue and silver color scheme, modern minimalist design, circuit board background pattern, professional photography style, high contrast text areas, 85cm x 200cm proportion --ar 17:40 --v 6 --style corporate"
- Variations: Add industry-specific terms like "artificial intelligence," "cybersecurity," or "cloud computing"
-
Healthcare Exhibition Display:
- Prompt: "medical conference exhibition banner, trustworthy blue and white colors, clean modern healthcare design, professional medical imagery, patient care theme, Singapore healthcare setting --ar 17:40 --v 6 --quality 2"
- Enhancement: Include specific medical specialties or equipment
-
Financial Services Pop-Up:
- Prompt: "financial services pop-up display backdrop, sophisticated navy blue and gold color palette, Singapore business district background, professional executives, modern banking theme, large format display --ar 16:9 --v 6 --stylize 250"
- Customization: Add specific financial products or services
Adobe Firefly Integration Techniques:
-
Background Generation:
- Create custom backgrounds using text prompts
- Example: "Singapore cityscape background, soft focus, professional lighting, corporate blue tones"
- Generate multiple variations for A/B testing
- Maintain consistent lighting and color temperature
-
Generative Fill for Banner Enhancement:
- Remove unwanted elements from stock photography
- Add complementary design elements seamlessly
- Extend backgrounds for different banner proportions
- Create custom product visualizations
AI-Generated Content Quality Control
Commercial Use Verification:
-
Licensing Compliance:
- Adobe Firefly: Commercially safe, trained on licensed content
- Midjourney: Commercial license included with paid subscriptions
- DALL-E: OpenAI terms allow commercial use
- Always verify current licensing terms before publication
-
Quality Assessment Criteria:
- Resolution adequacy for intended print size
- Color accuracy and CMYK compatibility
- Text readability and professional appearance
- Brand alignment and message consistency
Chapter 7: File Preparation and Production Management
Professional Export Specifications
PDF Export Settings by Software:
Photoshop Professional PDF Export:
-
Export Process:
- File > Export > Export As > Photoshop PDF
- Adobe PDF Preset: [PDF/X-1a:2001]
- Compression: Maximum quality (no compression)
- Color Management: Embed color profile
- Security: No password protection for printing
-
Quality Verification:
- Open exported PDF in Adobe Acrobat
- Check Print Production > Output Preview
- Verify CMYK color separation
- Confirm no RGB or spot colors present
Illustrator Vector PDF Creation:
-
Export Configuration:
- File > Save As > Adobe PDF (Print)
- Adobe PDF Preset: [PDF/X-4:2008]
- Compatibility: Acrobat 8 (PDF 1.7)
- Preserve Illustrator Editing Capabilities: Unchecked
-
Advanced Settings:
- Images: Maximum quality, no downsampling
- Compression: ZIP compression for color images
- Marks and Bleeds: Include if required by printer
- Output: Color conversion = No color conversion
Download free design templates and specifications from our Templates & Specsheets section to ensure your artwork meets professional printing standards and includes proper bleed and safety zones.
File Organization and Version Control
Professional File Naming Convention:
-
Naming Structure:
- Format: [Company]_[Event]_[Product]_[Size]_[Version]_[Date]
- Example: "TechCorp_ITShow2025_PullUpBanner_85x200_v3_20250629"
- Use underscores instead of spaces for compatibility
- Include dimensions for easy identification
-
Version Control System:
- Working files: Company_Project_WIP_v1, v2, v3...
- Client review: Company_Project_REVIEW_v1, v2...
- Final approved: Company_Project_FINAL_approved
- Print ready: Company_Project_PRINT_final.pdf
Chapter 8: Singapore Climate and Material Selection
Tropical Climate Considerations
Humidity Impact Analysis:
-
Material Behavior in 84% Humidity:
- Paper-based materials: 15-20% dimensional change possible
- Vinyl substrates: Minimal dimensional stability (2-3%)
- Fabric materials: Moderate stability with proper treatments
- Laminated prints: Enhanced protection against moisture
-
Indoor vs Outdoor Applications:
- Air-conditioned venues: Standard materials acceptable
- Partially covered areas: UV-resistant treatments required
- Fully outdoor: Weatherproof substrates mandatory
- Storage considerations: Climate-controlled recommended
Professional Material Specifications:
Indoor Exhibition Materials:
-
Premium Vinyl Banner (440gsm):
- Composition: PVC with polyester scrim reinforcement
- Tensile strength: 280N/5cm longitudinal
- Tear resistance: 35N longitudinal
- Temperature range: -20°C to +70°C
- Flame retardancy: NFPA 701 certified
-
Fabric Banner (300gsm Polyester):
- Weave: Plain weave, 100% polyester
- Finish: Matte, non-reflective surface
- Wrinkle resistance: Excellent for transport
- Color fastness: ISO 105-B02 Grade 7-8
- Washability: Machine washable at 30°C
Outdoor Weather-Resistant Options:
-
Heavy Duty Vinyl (610gsm):
- UV stability: 5+ years outdoor life expectancy
- Wind resistance: Suitable for moderate exposure
- Temperature cycling: -30°C to +80°C
- Chemical resistance: Excellent against pollutants
-
Mesh Banner (50% Perforated):
- Wind reduction: 50% air flow through material
- Visibility: 95% graphic clarity maintained
- Applications: Ideal for windy exhibition halls
- Durability: Extended life in challenging conditions
Sustainable Material Options
Eco-Friendly Substrate Selection:
-
Recyclable Vinyl Alternatives:
- Bio-based vinyl: 30-50% plant-derived content
- PET fabric: 100% recyclable polyester base
- LDPE film: Recyclable through specialized programs
- FSC-certified paper: For indoor, short-term displays
-
Water-Based Ink Systems:
- VOC emissions: 95% reduction vs. solvent inks
- Color quality: Matches traditional UV inks
- Durability: 2-3 year outdoor life expectancy
- Certifications: GREENGUARD, OEKO-TEX approved
Chapter 9: Quality Assurance and Testing Protocols
Pre-Production Proof Testing
Color Accuracy Verification Process:
-
Digital Proofing:
- Order certified digital proofs from printer
- Compare against Pantone color standards
- Test under exhibition lighting conditions
- Document any acceptable color variations
-
Physical Sample Testing:
- Request A3-size physical proof on actual substrate
- Verify material texture and finish quality
- Test readability from intended viewing distances
- Assess color saturation and contrast levels
-
Lighting Simulation:
- Test under fluorescent lighting (Suntec typical)
- Evaluate under LED lighting (Marina Bay Sands)
- Check appearance under mixed lighting conditions
- Document optimal lighting for booth placement
Assembly and Installation Testing
Pre-Event Setup Procedures:
-
Complete Assembly Test:
- Practice full setup with actual hardware
- Time assembly process (target: under 5 minutes)
- Test stability and structural integrity
- Verify graphic fit and tension
-
Transport Simulation:
- Pack display in traveling configuration
- Simulate vehicle transport and handling
- Unpack and check for damage or wrinkles
- Document any special handling requirements
-
Contingency Planning:
- Prepare backup graphics for critical events
- Identify local quick-print resources
- Document alternative setup configurations
- Create emergency contact list for support
Chapter 10: Interactive Elements and Technology Integration
QR Code Design and Implementation
Technical QR Code Specifications:
-
Size and Positioning Requirements:
- Minimum size: 3cm x 3cm for smartphone scanning
- Optimal size: 5cm x 5cm for easy recognition
- Maximum size: 8cm x 8cm (avoid overwhelming design)
- Placement: Bottom right or dedicated action zone
-
Design Integration:
- Contrast ratio: Minimum 3:1 with background
- Quiet zone: 4-module border around QR code
- Custom styling: Logo embedding up to 30% coverage
- Error correction: Level M (15%) recommended
-
Landing Page Optimization:
- Mobile-responsive design mandatory
- Loading time: Under 3 seconds target
- Exhibition-specific content and offers
- Lead capture forms with minimal fields
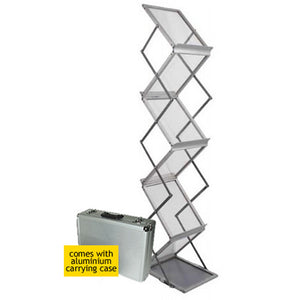
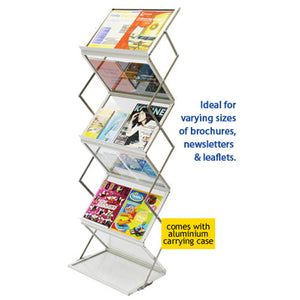
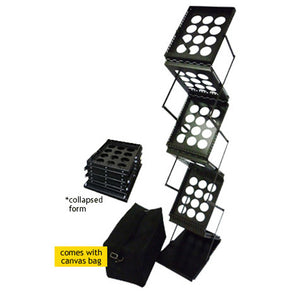
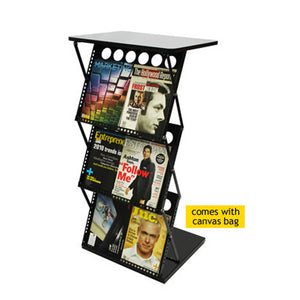
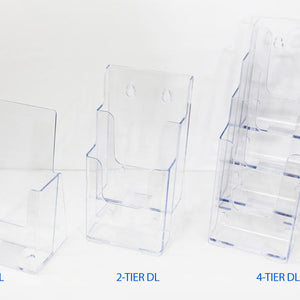
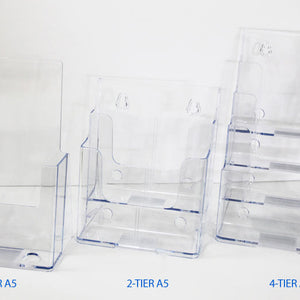
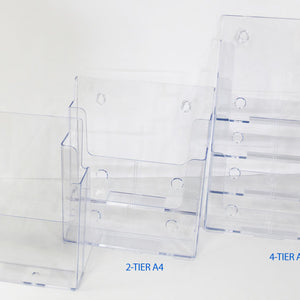
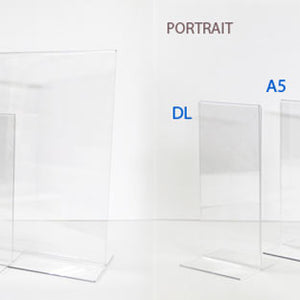
Enhance your booth with professional literature displays using our Brochure Stands and Acrylic Holders for organized information distribution and QR code placement.
Digital Display Integration
Screen Integration Strategies:
-
Display Sizing and Placement:
- 32-inch displays: Table-top or counter mounting
- 43-55 inch displays: Floor standing or wall mounting
- Ultra-wide displays: Panoramic content showcase
- Portrait orientation: Ideal for banner-style content
-
Content Management:
- Loop duration: 30-60 seconds optimal
- Content updates: Real-time capability preferred
- Backup content: Static images if connectivity fails
- Brightness adjustment: Venue-specific calibration
Chapter 11: Performance Measurement and ROI Analysis
Exhibition Metrics and KPI Tracking
Lead Generation Tracking Systems:
-
Digital Tracking Methods:
- QR code analytics: Google Analytics UTM parameters
- Landing page conversions: Forms, downloads, demos
- Social media engagement: Hashtag monitoring
- Email capture: Exhibition-specific signup forms
-
Physical Interaction Tracking:
- Business card collection with source coding
- Prize draw entries with contact capture
- Product demo requests and scheduling
- Literature distribution tracking
-
Quality Assessment Metrics:
- Lead scoring: Budget authority, timeline, need
- Qualification rate: Percentage of sales-ready leads
- Follow-up response rate: Post-exhibition engagement
- Conversion to opportunity: CRM tracking
ROI Calculation and Analysis
Comprehensive Cost Analysis:
-
Direct Exhibition Costs:
- Booth space rental: $200-800 per sqm Singapore average
- Display design and production: $500-2000 typical range
- Shipping and logistics: $150-500 depending on complexity
- Setup and dismantling: $300-800 labor costs
-
Indirect Costs:
- Staff time and travel: 2-5 person-days typical
- Accommodation and meals: $150-300 per person per day
- Marketing collateral: $200-600 printing costs
- Follow-up activities: Sales team time allocation
-
Revenue Attribution:
- Direct sales: Closed within 6 months of exhibition
- Pipeline opportunities: Qualified prospects in CRM
- Brand awareness value: Survey-based measurement
- Partnership opportunities: Strategic relationship value
ROI Calculation Formula and Benchmarks:
-
Basic ROI Calculation:
- ROI = (Revenue Generated - Total Costs) ÷ Total Costs × 100
- Example: $50,000 revenue - $8,000 costs = $42,000 profit
- ROI = $42,000 ÷ $8,000 × 100 = 525% ROI
- Industry benchmark: 300-500% ROI for successful exhibitions
-
Advanced Metrics:
- Cost per lead: Total costs ÷ number of qualified leads
- Lead-to-customer conversion rate: Industry average 15-25%
- Customer lifetime value: Long-term revenue potential
- Brand equity improvement: Measured through surveys
Chapter 12: Advanced Design Strategies and Future Trends
Multi-Language Exhibition Design
Singapore Market Language Considerations:
-
Primary Languages by Industry:
- Technology: English primary, Mandarin secondary
- Manufacturing: English and Mandarin equally important
- Healthcare: English dominant, local language support
- Financial services: English primary, multilingual staff
-
Design Layout for Multiple Languages:
- Hierarchical approach: 60% primary, 40% secondary language
- Separate panels: Dedicated language zones
- Universal symbols: Reduce text dependency
- Digital displays: Rotating language content
Sustainability and Future-Proofing
2025 Sustainability Trends:
-
Circular Design Principles:
- Modular systems: Reusable across multiple events
- Material selection: Fully recyclable substrates
- Digital integration: Reduce printed material volume
- Local production: Minimize shipping carbon footprint
-
Technology Integration Trends:
- Augmented reality: Product visualization without samples
- NFC technology: Contactless information sharing
- IoT sensors: Real-time visitor engagement analytics
- AI personalization: Dynamic content adaptation
Quick Reference Specifications
Pull-Up Banner Specifications
- Standard Size: 85cm x 200cm (most popular)
- Alternative Widths: 60cm, 70cm, 80cm, 100cm, 120cm, 150cm
- Resolution: 125 DPI minimum for quality results
- Color Mode: CMYK only (never RGB for printing)
- File Format: PDF/X-1a preferred, high-res TIFF acceptable
- Safety Zone: 5cm minimum from all edges
- Material: 440gsm vinyl banner with matte lamination
- Hardware Weight: 2.5-4.5kg depending on series
- Setup Time: 60-120 seconds typical
View our complete Premium Pull-Up Banner Stands for professional display solutions starting from $110 SGD with enhanced stability features.
Pop-Up Display Specifications
- Panel Configuration: 3x3 (9 panels), 3x4 (12 panels), 4x3 (12 panels)
- Individual Panel Size: 60cm x 60cm standard
- Total Display Area: 180cm x 180cm (3x3), 240cm x 180cm (4x3)
- Resolution: 100 DPI optimal for viewing distance
- Panel Overlap: 5cm compensation for curved displays
- Material: Fabric or vinyl with Velcro backing system
- Frame Material: Aluminum tube with spring-loaded connectors
- Setup Time: 10-15 minutes for complete installation
- Transport: Compact wheeled case for portability
Display Stand Specifications
- X-Banner Sizes: 40x120cm, 60x160cm, 80x180cm, 120x200cm
- A-Frame Poster: A1 (59.4x84.1cm), A0 (84.1x118.9cm)
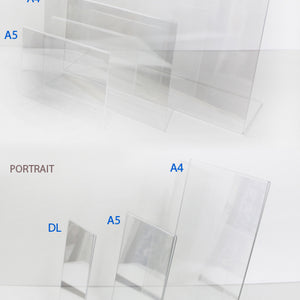
- Sign Stands: A4 (21x29.7cm), A3 (29.7x42cm) portrait/landscape
- Outdoor Rating: IP65 weatherproof for covered outdoor use
- Wind Resistance: Up to 40km/h with proper weighting
- Viewing Distance: Design for 2-8 meter optimal readability
Troubleshooting Common Design Issues
Color and Printing Problems
-
Colors Look Dull After Printing:
- Cause: RGB to CMYK conversion without adjustment
- Solution: Manually adjust saturation +15-25% in CMYK
- Prevention: Design in CMYK from project start
-
Text Appears Blurry or Pixelated:
- Cause: Insufficient resolution or rasterized text
- Solution: Use vector text, minimum 125 DPI for banners
- Prevention: Keep text as vectors until final export
-
Banner Material Wrinkles or Warps:
- Cause: Material not suitable for climate/application
- Solution: Specify humidity-resistant materials
- Prevention: Discuss venue conditions with printer
Design and Layout Issues
-
Content Not Readable from Distance:
- Cause: Text too small or insufficient contrast
- Solution: Minimum 72pt headlines, 4.5:1 contrast ratio
- Prevention: Test readability at 25% scale
-
Brand Colors Don't Match:
- Cause: Incorrect color profile or conversion
- Solution: Use Pantone solid-to-process guides
- Prevention: Order color proofs before production
Conclusion: Your Path to Exhibition Success
Mastering exhibition design requires combining creative vision with technical precision. This comprehensive guide provides you with professional-grade knowledge used by successful Singapore businesses to generate 300% more leads through strategic display design.
Key success factors for immediate implementation:
- Strategic Planning: Research your audience and competitive landscape thoroughly
- Professional Tools: Invest in quality design software and AI-powered enhancement tools
- Technical Excellence: Always work in CMYK, maintain proper resolution standards
- Climate Adaptation: Choose materials appropriate for Singapore's humid environment
- Quality Assurance: Test designs with physical proofs before large production runs
- Performance Measurement: Track ROI and optimize based on data-driven insights
Singapore's exhibition market continues growing, with opportunities expanding for businesses that invest in professional design quality. The techniques in this guide have helped thousands of companies achieve measurable exhibition success across Marina Bay Sands, Suntec Convention Centre, and other premier venues.
Start implementing these strategies today. Begin with clear objectives, leverage AI tools for efficiency, and maintain unwavering focus on professional quality standards. Your next exhibition success starts with the design decisions you make right now.
Singapore's exhibition industry continues growing, with increasing international participation and government support. Companies that establish strong exhibition presence now will benefit from expanding opportunities and growing buyer markets.
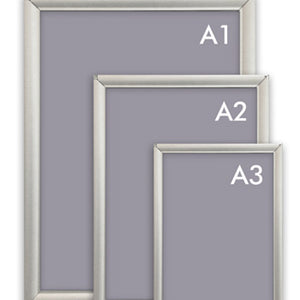
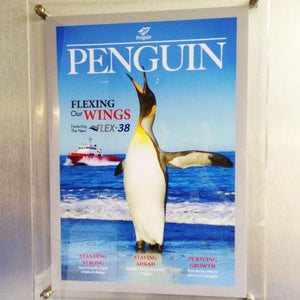
For complete exhibition solutions, explore our full range including Clear Acrylic Frames for poster displays, professional brochure distribution systems, and large format wall graphics that transform exhibition spaces.
For professional printing services and expert consultation, visit PullUpStand.com. Our team has helped over 10,000 businesses achieve exhibition success with fast turnaround, premium materials, and competitive pricing across Singapore.
Browse our complete product collections including Pull Up Stands, Pop Up Displays, Digital Display Stands, Brochure Holders, Wall Murals, and comprehensive printing solutions for all your exhibition needs.


